Showing posts with label precitec nozzle. Show all posts

Monday, February 17, 2020

Laser Engraving: The Best Solution to Mark Medical Equipment

Medical equipment, devices, and tools are the most important assets for any hospital. As each one of them has a specific purpose, bifurcating and marking them with the correct data is also critical.

Apart from identifying their use, it is important to label them according to their use. Additionally, it helps the service team perform the maintenance activities, helps the procurement team to procure the right equipment and many more. To mark the equipment, out of all the available methods, Laser marking can be the best way as it does not affect its chemical state.
Trumpf_Standard
Let’s understand why laser marking is essential:


In 2013, the Food and Drug Association (FDA) made marking of the medical equipment compulsory. The major reason behind this was to identify and trace the equipment. They also require marks like logos, alphanumeric, codes, etc. to be clear and readable.

They even added that all medical equipment should have a Unique Device Identification (UDI). This UDI consists of the manufacturer's name, make or model of the product, expiry date or other attributes if any.

Further, the government also issues guidelines on marking equipment with unique identifiers. This means these marks are compulsory for all medical equipment from tiny devices like implants to large equipment.

How to Laser Mark

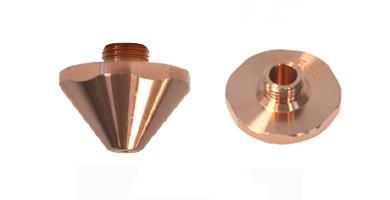
You can easily do it on the selected area especially on prepared plastic surfaces, metallic or delicate materials like foil or laminate. Unlike other labeling methods, laser marking does not involve direct contact. Consisting of different laser parts like Trumpf nozzles and Precitec nozzle, here are its major types:

1. Foaming:

This type of laser marking melts the material and is often done on the dark plastics. After the process, the marked area becomes lighter than the rest of the material.

2. Engraving:

This popular way for laser marking melts, evaporates, leaves the impression of design, logo, numbers, and text.

3. Carbonizing:

Carbonizing is useful in wooden or leather surfaces. It leaves a dark mark after the use.

4. Staining:

This type of laser cutting machine causes the heat effect and changes the color of the marked parts the same way when something burns.

5. Annealing:

After exposure to the laser beams, the surface of the material undergoes oxidation and changes because of the heat. This method is useful when working with metal materials.

6. Removing:

To get rid of the topcoat of the material this marking method can be the solution. One can perform this type of marking preferably on laminates, foils, coated metals or aluminum.

Benefits of Laser Marking Medical Equipment:
  1. It becomes easy to track the devices in cases of malfunctions, emergencies, maintenance, etc.
  2. Laser marking helps in protecting the trademark of medical equipment and devices. In turn, facilities, hospitals, and pharmacies can easily tell if they are original or not.
  3. These markings make it easy for users to identify manufacturers and find details of particular medical equipment.
  4. As it is a non-contact form of labeling, laser marking leaves the delicate parts of the equipment untouched.
  5. With laser marking, it becomes easy to trace the manufacturer.
  6. Laser marking guarantees precise results. It means that you can mark all medical equipment, tools, and devices with the same sign at the same spot.
  7. Manufacturers can trace their products and get data on their performance to know they are performing well or having any defect.
Conclusion:

Overall, laser marking uses laser beams to label equipment, tools, devices, parts, and materials. As this method is durable, the mark never wears out. It withstands chemicals, moisture, heat, and other harsh conditions that can ruin the other kind of labeling. To smartly brand your medical equipment, one should adopt this technology. You can easily find the laser engraving machines online or its parts like Trumpf nozzles and Precitec nozzle if you already have invested in a machine to get started.

Source: https://altpartsinc.wixsite.com/altpartsinc/single-post/2020/02/18/Laser-Engraving-The-Best-Solution-to-Mark-Medical-Equipment

Saturday, November 2, 2019

Things You Must Know Before You Start Laser Cutting

Laser cutting, etching, engraving. It is one of the coolest ways to bring your designs to reality. It provides you results with precision, multi-layered lettering, and design.

Laser cutters are powerful, realistic tools to burn most things like wood, paper, plastic to create a design that you imagine.

So, before you buy a laser cutter, keep these five things in mind to make a precise choice.

The Main Choice: Laser Cutter

A typical laser cutter that most designers and engineers use consists of a 100W laser that have Trumpf nozzles. Between the laser’s extractor fan and sourced materials, your cost can reach $8000 to construct the whole setup. If you are just starting, you can even go for a smaller laser like 40W laser cutters available online. You can even search for parts like precitec nozzles or Trumpf parts online to setup the perfect product for your use.

40W laser cutter can help you with etching the designs you want on a thin place of birch plywood. You can also use acrylic material if you are looking for some cool opaque effects. Also, you can retrofit an old DVD players’ 5W laser into a working laser cutter if you have smaller use cases. It can do more than just etching a design on a piece of paper.

How to Source the Equipment to Build One?

In the digital age, you find many online options for your requirements. For nozzle parts, you can go for precitec nozzles, Trumpf nozzles online to source the best equipment for your business. Other than that consider referrals from your circle. They might also work best!  

What Materials to Choose?

You can not just pick any old material and start blasting it with a laser. There are numerous materials like polycarbonate sheets that produce thick, acrid smoke when coming in contact with the laser. Also, make sure that you don't go for cardboard as much as possible. Because the focused heat can cause fire easily when dealing with electrical equipment.

Birch plywood is a few millimeters thick but worth to add material; you can design simply with this material.


Your First Design

To find the best designs to start with, the internet is your bible. Of Course, it does not mean copying others' work. But you can get some cool ideas with which you can create your own designs. You get ready-made SVG files, DXF to put into a laser cutter software for printing.

General Things for Using Laser Cutter

Power: It defines the output power of the laser. It can be from 0 to 100%. Generally, high power to cut thick materials and lower power to engrave and cut thin materials.

Speed: It decides the movement speed of the laser head. To engrave and cut thin material, the speed is usually set to the maximum.

Frequency (Hz, PPI): It specifies the number of laser pulses per second. For instance, wood cuts are best at 500 to 1000 Hz. For acrylic, 5000 to 20000 Hz is the minimum requirement.

Focus: There comes a focus lens inside the laser head. It should be on the surface of the material or slightly below for most of the applications. Make sure that materials are at a certain distance from the lens. The exact distance depends on the type of focus lens.

There are so many types of laser machines that come with a motorized bed. You can move up and down to set the focus distance. And the position of the material surface should be also manually adjusted.

Parts: Make sure you are using the best brand parts like Trumpf nozzles, Amada laser parts, etc. to get the most accurate results.

It’s time to cut!

Don’t worry, it can take a few tries to find the ideal settings for your material. Make sure you change only one parameter in a test process. For example, do not forget to write down your current settings for future reference.

Friday, October 4, 2019

How to Maximizing Your Laser Production

With laser engraving and cutting system, there is one thing that comes as an absolute benefit: the speed. These systems render the fastest results to etch a pattern or cut the piece with the design. But when you have such a system in place, it is important to maintain efficiency otherwise it can hamper your overall growth. So, here are six hacks to help you with maximizing your Laser Production. 
  1. Make a Batch
A basic thing to pay your attention to. When you print multiples at one time, it reduces production time. This can be possible in the cases when you require the same engraving or cutting on more than one item. When you engrave in batches, you can experience an increase of 37% in the time savings. When you are working in the batches, how many products would go in once depends hugely on the table size. You need to enlarge the page size in your graphic design program to match the full table size where you place your laser. In such cases, you can use a jig to space out the items. The output from any batch would be a result of using the right nozzle which includes a Trumpf nozzle or Precitec nozzles.

Adjusting Resolution

This is another factor to consider when you want to increase production. Especially in engraving jobs, it is important that the final image output is adequate. When you keep your DPI(Dots per inch) higher, it will take longer to engrave the item. And if your DPIs are higher, then the dots are going to be closer together. This will produce a detailed image, but it might take a bit longer time. If you lower your engraving resolution a bit, it can increase your time savings by 33% or more. The key here is to find the right combination of resolution and pattern which render achievable results with good quality in less time.


Color Mapping

Using color mapping can save your engraving time. For example, there is a design with three columns and in it, there are 30 names. At first, the laser will see it as one image and the laser head will travel over the white space columns to engrave the graphic. When you have a color mapping in place, it enables you to skip all the white space as it assigns each column a different color and an associated engraving order. This way, the laser will engrave one column at a time, traveling over white space. It will save you almost 43% time depending on the item you have put for the job. For better results of this technique, you can use a Trumpf nozzle or Precitec nozzles in the implementation.

Center engraving

This makes it easy to work with the various sized items, as you can create a custom template for each one. It allows the user to move the laser by hand to the center of the project. Set the center point as the new home position and the laser will utilize that point to properly place the graphic. Compared to other items it will save you a lot of time.

Pre-engrave Items

Customization is a great opportunity to give your business a new customer base. But singular jobs can prove to be very inefficient. Because if you load and produce the same design over and over in your engraving machine, it consumes a lot of your production time. To overcome this obstacle, you can pre-engrave and create an inventory of your popular items. This way you can just load pre-engraved material and save a lot of money & time.  Thus, pre-engraving can help you to engrave the same items in one go to decrease the production time. It becomes easy to pre-engrave the major graphics of the design onto a batch. Once the order comes in, you can simply use one of the pre-engraved boards back in the machine.

Using Job Manager

Using a job manager will help in keeping track of the regular jobs done in your laser machine. It becomes easy to streamline your laser processing workflow. It saves your time by giving you access to job time records, databases, status and more.

In a Nutshell
It is important to maximize your laser production for long-term production benefits. When it comes to laser machines, keeping these little things in place would help you eliminate unnecessary gaps in your system. Plus, an increased rate of the job will be your additional advantage.

Tuesday, August 13, 2019

A Guide to Maintaining Press Brakes

If you work in the metal fabrication industry, you must be knowing that Press brakes are an important part of any equipment. Thin sheets of metal and sheet metals made to particular specifications using CD/CAM are widely in use in the construction and manufacturing industries. Press brakes help bend these sheets of metal in a number of different ways.

If you are just starting in the industry, here’s all you will need to know:

Types of Press Brakes

Mainly there are three different forms of Press Brakes. Hydraulic, mechanical, and pneumatic. In the market, a hydraulic press is a superior quality press brake providing best quality results. Because of the difference in trigger mechanisms. There are different types of parts in Amada press brake including precitec parts. Each part refers to a different use. In the mechanical brakes, it uses a spring-loaded trigger. Pneumatic brakes use an air trigger. When you press the trigger in these brakes, the machine will start working.

With the hydraulic press brake, you can stop it at any point even after its stroke. In this case, the operator will have a greater degree of control over what they are doing. Thus, it helps in achieving more precise results. You can also operate Hydraulic presses at a slower pace. It gives the operator time to fine-tune the piece to their liking. 


Bends and Dies

You can change the parts of the press brake. You can take them out and replace it with precitec nozzles or any other required part. Just as you changing the function and capabilities of a drill by changing the type of drill bit, changing the bends and dies in the press brake will change what it is supposed to be doing.

Precision Control

In order to run the press brake efficiently, a skilled operator is a must-have. When it comes to CAD and CAM, they have their made place in manufacturing and construction. But even when you implement them in your system, you will need a skilled operator to monitor the work and make sure that there is no defect in the final outcome.

Maintenance

If you as a fabricator are considering to buy your own press brake, it is important to understand the steps of maintenance. The good thing is, the maintenance is not that complicated compared to other machinery. Make sure to follow the manuals and keep checking the machinery on a regular interval, you might not get many issues.

Regularly clean the press brake. Make sure to remove any oil and dust which might have made their place. Doing it on a weekly basis is a great thing. All the oil filters will need changing on a yearly basis at least.

Make Sure to Take Precautions

Before performing any operations using press brake, it is necessary to support the ram of the machine. You can place the ram on two equal size wooden blocks. You can also lower the ram by the tooling. 

Review it Mechanically

It is important to review piston bolts, chain sprockets, precitec nozzles, and guides of the press brake. Make sure to check the connection between the pistons and ram on a regular base. Also, to calibrate or realign the back gauge and stops.

Lubrication at a minimum number of points in modern press brake is also important. Keep moving components such as back gauge, guiding systems, and ball screws clean. Don’t forget to grease them to extend the press brake’s function and life.
Here are the components which require weekly lubrication:
  • Ram guiding system
  • Ball screws
  • Guide encoders, encoder guiding system
  • Gear segment
  • Rack and pinion system
  • Guides and rails
Press brakes are a simple piece of machinery. In order to maintain it and leverage the functionality over a long period, follow the right steps to maintain it. Even the highest quality press brakes like Amada press brake need maintenance on a regular basis. It is a common equipment for a variety of reasons. It soon will be working with materials like graphene and other synthetic metamaterials. Make sure you make it an excellent investment for your metal projects.